
AI Photo Editing Software for Retouching, Cutouts and Upscaling on the Local PC
AI photo editing software pairs the familiar adjustments of a classic editor with trained models that take over the tedious parts of retouching. The MKGpics AI Photo Editor follows exactly that approach. Colorizing a black and white portrait, removing a stranger from a holiday snapshot, cutting a product out of its background or enlarging a small file to four times its size no longer means hours of manual masking. The models run on the local computer, so photos stay where they were saved. Sliders, crop, text and stamp functions sit in the same window as the AI modules. The sections below explain what the program contains, how the hand-over between editor and modules works and which jobs it handles best.
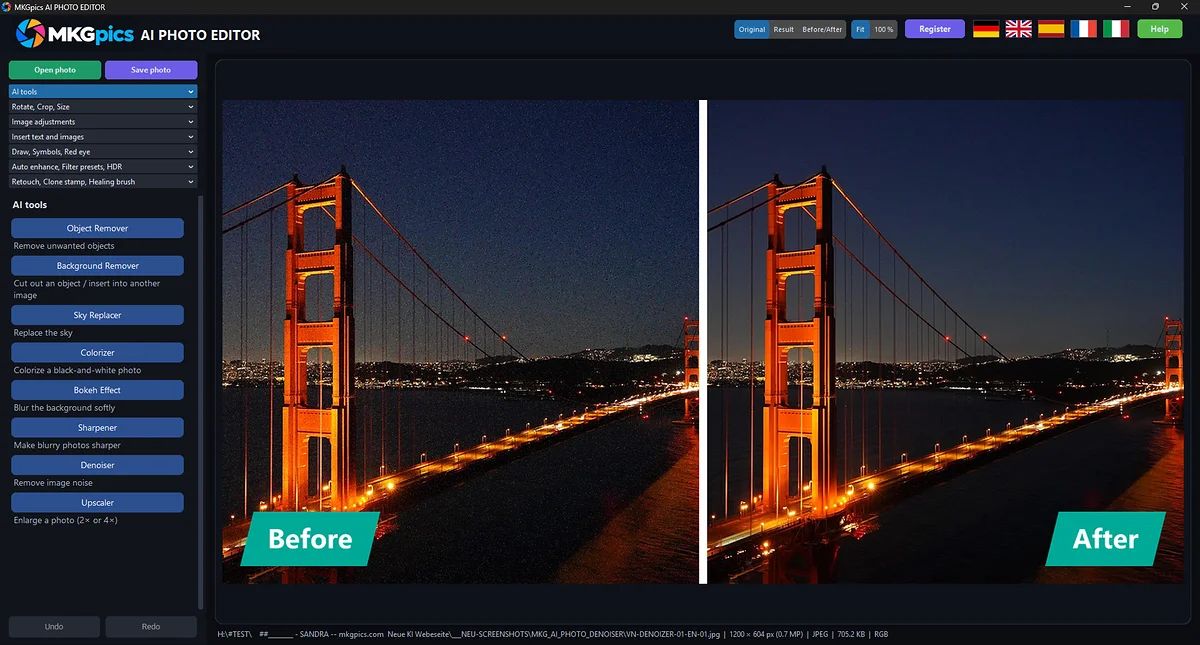
AI photo editing software with the AI tab and a before and after view
How AI Photo Editing Software Differs from Classic Editors
Classic editors rely on manual selections. A lasso, a brush and a steady hand decide how clean a cutout turns out, and one wrong stroke around a strand of hair can ruin twenty minutes of work. AI photo editing software estimates the subject outline, the depth of a scene or the missing background by itself. The result arrives within seconds, which sets this kind of AI photo editing software apart from manual masking, and the manual functions stay at hand for touch-ups. That changes the order of work: automatic step first, fine correction second. Quality still depends on the source image. A sharp, well-lit original gives a model more to work with than a heavily compressed thumbnail. A second pass with another module can repair what the first one left behind.
Modules Inside the AI Photo Editing Software
The AI functions are gathered in one tab. A click hands the current photo to the chosen module, which opens in its own window. After saving, the edited image returns to the editor, while closing the window without saving leaves the original untouched. Each module covers a single task, so the settings stay short and the outcome stays predictable. Results can be chained, for instance denoising first, sharpening second and enlarging last. That order matters, because enlarging a noisy file multiplies the grain along with the pixels. The table lists every module of the AI photo editing software and the classic editing functions next to it, together with a typical source image and the expected result.
| Function | Task | Typical Source Image | Expected Result |
|---|---|---|---|
| Colorizer | Adds natural colors to monochrome photos | Scanned family prints, archive portraits | Colored version that the editor sliders can fine tune |
| Object Remover | Erases unwanted items and rebuilds the area behind them | Holiday shots with passers-by, signs or cables | Tidy scene with a reconstructed background |
| Background Remover | Separates the subject from its surroundings, fine edges such as hair included | Portraits, product photos, pet pictures | Isolated subject for a new backdrop |
| Bokeh | Simulates lens blur from estimated distances | Snapshots with a busy background | Soft background around a sharp subject |
| Denoiser | Reduces grain and color noise | Night shots, high ISO files | Calmer surfaces in shadows and skies |
| Sky Replacer | Swaps the sky for a better one | Landscapes, buildings, property photos | New sky that matches the scene |
| Sharpener | Restores definition in soft details without hard edges | Slightly blurred or shaken pictures | Crisper contours |
| Upscaler | Enlarges to double or four times the size | Small web images, low resolution scans | Larger file for print or big screens |
| Rotate, Crop, Straighten, Resize | Reframes and aligns the picture | Tilted horizons, loose compositions | Balanced frame in the needed dimensions |
| Twelve adjustment sliders | Control brightness, exposure, contrast and further tonal values | Flat or too dark exposures | Corrected tonality |
| Clone Stamp, Healing Brush, Red Eye | Retouches small blemishes | Dust spots, skin marks, flash portraits | Clean details |
| Text, Logos, Arrows, Frames, Shapes | Adds annotations and branding | Social posts, tutorials, shop images | Finished graphic with outlines and shadows |
| Export | Saves in PNG, JPG, WebP, TIFF or PDF | Any edited image | File in the format the destination expects |
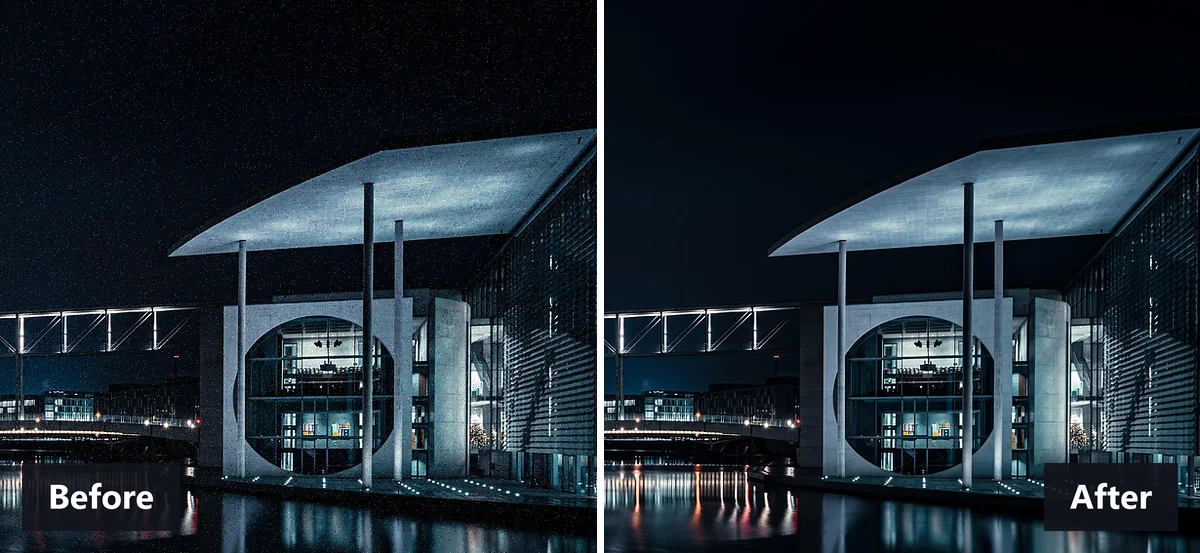
Before and after comparison of a night photo with the Denoiser
Classic Editing Functions Alongside the AI Modules
AI handles the heavy lifting, yet most photos still need ordinary corrections. The editor therefore keeps the traditional functions in one place. Rotating, cropping, straightening and resizing prepare the frame. Auto optimization, filter presets and HDR looks give a quick starting point, and the sliders refine it. Twenty steps of undo and redo plus a before and after view make comparing versions painless. Because these functions of the AI photo editing software share the interface with the AI modules, a finished image rarely needs a second program. The list shows what else this AI photo editing software keeps in the editor window.
- Clone stamp and healing brush for blemishes
- Red eye removal for flash portraits
- Text with outline, shadow and curve
- Logos, arrows, frames and shapes
- Export to PNG, JPG, WebP, TIFF and PDF
Workflow Between the Editor and the AI Modules
The AI modules are installed separately on the computer, one time only. Afterwards the tab opens each module from within the editor, and the finished image flows back after saving. A tidy sequence keeps the results of AI photo editing software predictable, and the following steps describe a typical run.
- Open the photo in the editor and crop or straighten it.
- Pick a module in the AI tab, for example Denoiser for a grainy night shot.
- Adjust the settings in the module window and save the result.
- Chain the next module back in the editor, such as Sharpener followed by Upscaler.
- Fine tune with the sliders and export in the needed format.
A sensible order runs from repair to enlargement. Objects and noise go first, tonal corrections follow, sharpening comes late and enlarging closes the chain. Colorizing a scan before cleaning its dust spots would paint the blemishes as well, which creates extra retouching later. Closing a module without saving drops the change, so a failed experiment costs nothing.
Local Processing and Privacy of Personal Photos
Cloud editors upload each file to a remote server, and the terms of that service decide what happens next. This AI photo editing software takes the opposite route. The calculations run on the PC with modern Python libraries, photos are neither uploaded nor collected, and none of them trains an AI model. After installation, no internet connection is required, which suits laptops on trains, studio machines without a network and sensitive client work. The download is free, and the program runs without a subscription and without ongoing costs. Unpublished shoots, family albums and confidential product prototypes stay on the drive where they were saved.
Who Benefits from AI Photo Editing Software
Photographers delivering client galleries, online sellers preparing catalog images, designers assembling layouts and hobbyists restoring family pictures face the same bottleneck: repetitive selections and repairs. AI photo editing software shortens exactly those steps and leaves the final judgment to the person at the screen. Not every group needs every module of the AI photo editing software. A product photographer lives in the Background Remover, a family historian in the Colorizer. The list pairs typical situations with the module that fits best, and combinations are common once a project grows beyond a single correction.
- Portrait photographers use Background Remover and Denoiser for client files
- Online sellers isolate products on uniform backgrounds
- Property and travel photographers swap flat grey skies with Sky Replacer
- Family historians restore scanned prints with Colorizer and Upscaler
- Designers remove distractions with Object Remover and add text or logos
Tips for Better Results in the Editing Process
Small habits improve outcomes noticeably. A model sees only pixels, so with AI photo editing software the quality of the input decides how convincing the output looks. Time spent choosing the right starting file and the right sequence pays back quickly, because every later module inherits the flaws of the earlier ones. The following habits come from typical editing sessions and apply to nearly every module of the AI photo editing software.
- Start from the highest resolution original instead of a saved web copy
- Remove objects before enlarging, since larger files expose leftover seams
- Apply denoising at moderate strength so skin and fabric keep their texture
- Inspect hair and fur edges at full zoom after a cutout
- Compare with the before and after view before exporting
- Export master files as TIFF or PNG and web copies as WebP or JPG
Saving each stage under a new file name keeps earlier versions available, which helps when a client asks for the version from before the sky swap. All details and the download of the program are listed on the page of the AI photo editing software from MKGpics.


